


Hey there, fellow web enthusiasts! Are you ready to take your web development skills to the next level? Today, I’m going to show you how to create a super cool and oh-so-sleek sticky header using the magical powers of CSS and JavaScript. It’s like giving your website a virtual superhero cape! 🦸♂️
Why Sticky Headers Are Awesome?
Before we dive into the nitty-gritty, let’s talk about why sticky headers are the bee’s knees. Imagine scrolling through a webpage, and suddenly, the header sticks to the top of the screen, staying put like a loyal sidekick. It’s not only visually appealing but also incredibly practical, ensuring your navigation is always at your users’ fingertips.
So, let’s roll up our sleeves and learn how to make that happen!
Step 1: Set Up Your HTML Structure
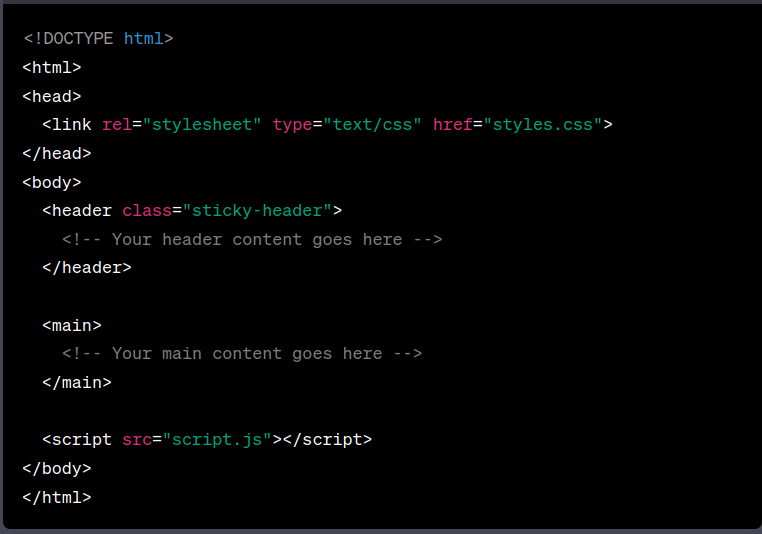
First things first, we need a solid foundation. Open up your favorite code editor (mine’s Visual Studio Code), create a new HTML file, and let’s start building our sticky header masterpiece.
Here’s a simple HTML structure to get you started:

Step 2: Style with CSS Magic
Time to sprinkle some CSS fairy dust and make our header sticky! Open a new file named styles.css and link it in your HTML file.

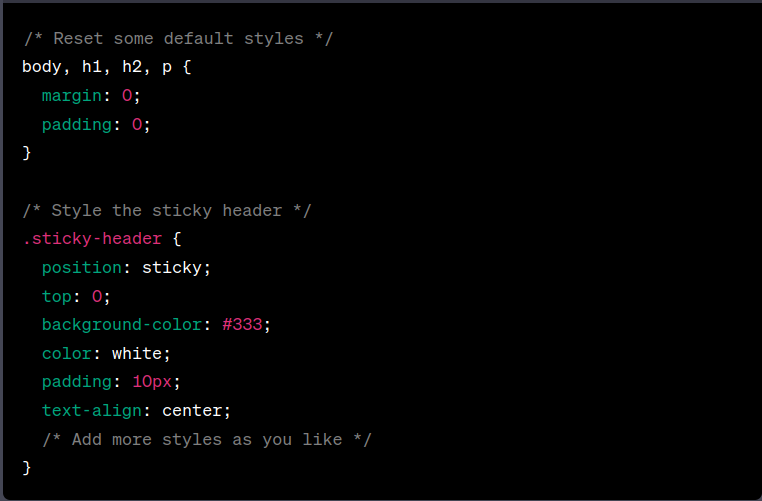
Feel free to customize the colors, fonts, and padding to match your website’s vibe. The position: sticky and top: 0 combo is the magic that keeps our header glued to the top of the screen as we scroll. Neat, right?
Step 3: Add Some JavaScript Sparkle
We’ve got our header looking sleek, but let’s make it even smarter. Open a new file named script.js and link it in your HTML file, just before the closing </body> tag.

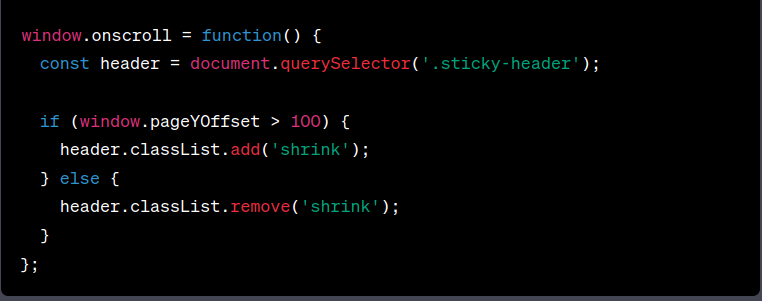
What this little snippet does is add a class called ‘shrink’ to our header when we scroll down 100 pixels or more. This class can then be used to style the header differently when it’s in its sticky state.
Step 4: Dance with CSS Transitions
Let’s add a touch of elegance by smoothly transitioning our header when it goes from its normal state to the sticky state. Back in your styles.css file, add this piece of CSS:


Now, as you scroll and the header sticks, it gracefully shrinks and changes its padding, giving it that extra touch of finesse.
Step 5: Give It a Whirl!
With all the pieces in place, it’s time for the moment of truth. Open your HTML file in a browser and start scrolling. Behold, your header will stick to the top of the screen like a loyal companion, and it’ll even elegantly shrink as you go.
Wrapping Up
And there you have it, my fellow web adventurer! You’ve just learned how to create a sticky header that not only sticks but also wows with a touch of JavaScript and a pinch of CSS magic. With these newfound powers, you can add a professional and engaging touch to your websites.
Feel free to experiment, tweak, and make it uniquely yours. After all, the web development world is your playground!
If you have any questions, aha moments, or just want to show off your stunning sticky header, drop a comment below. Happy coding, and may your headers always stick around! 🚀